Blog

Yoga Tip: Handstand

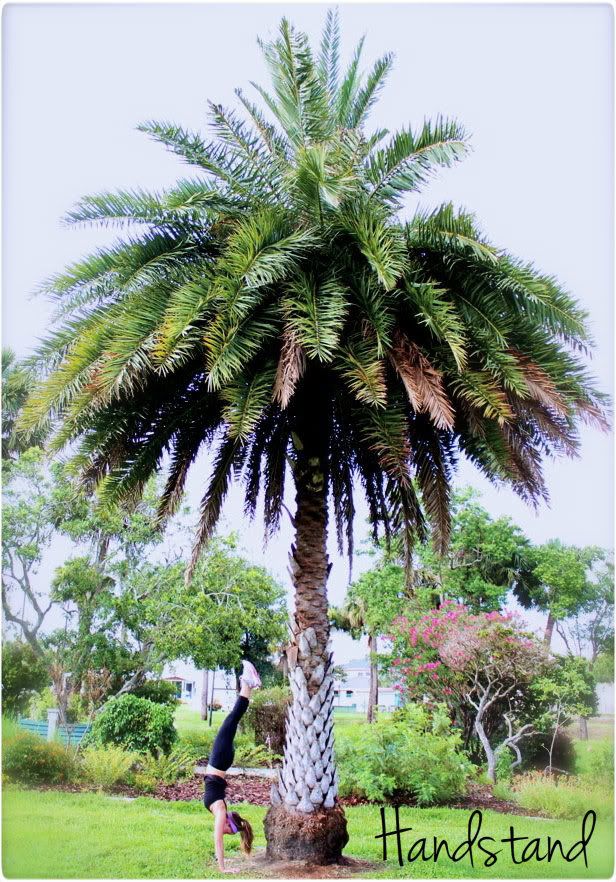
Even as a little girl in gymnastics class ardho mukha vkrsasana (aka handstand) was never something that came to me with ease. These days, with stiff wrists now and then, it still is a challenge. The other day, though, my wrists were feeling good and I was up for working on my handstand. I made good use of the giant palm tree in the park and went to it. If you're short on palm trees, a wall will do.

How to do it
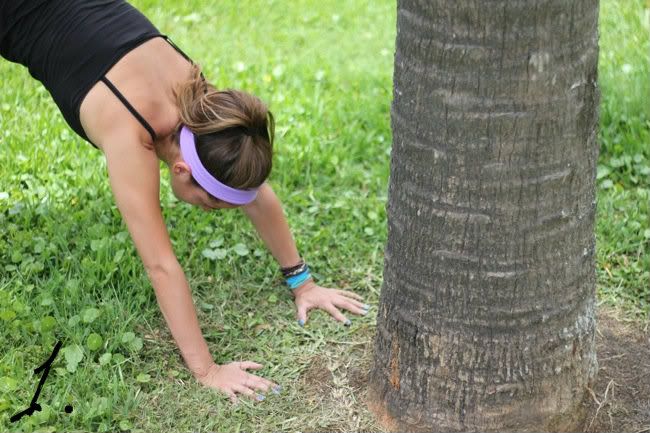
Step 1: Position your hands as close to the wall/tree as you can and find a drishti (focal point) between your hands.
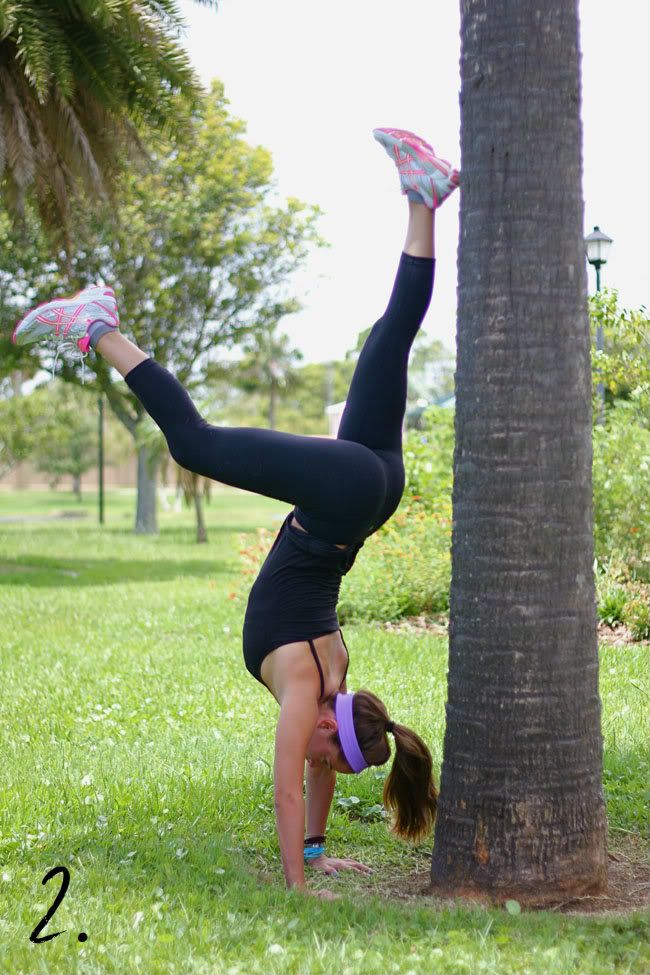
Step 2: Begin to kick up. You don't have to get it on the first try, just begin kicking so you can get comfortable supporting yourself on your hands.
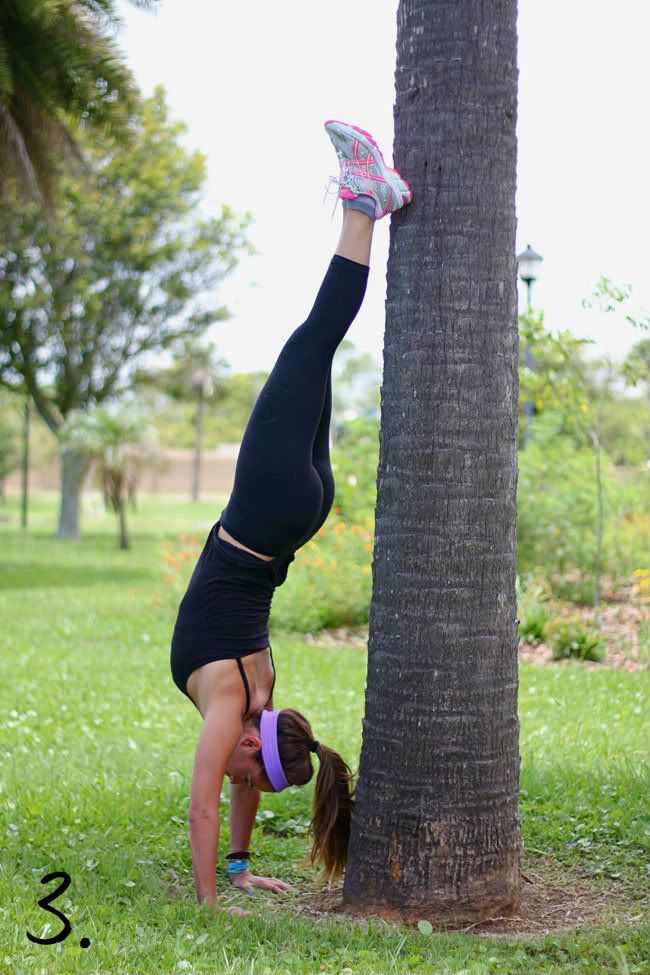
Step 3: When you're ready, kick all the way up, placing one foot on the trunk and then the other.
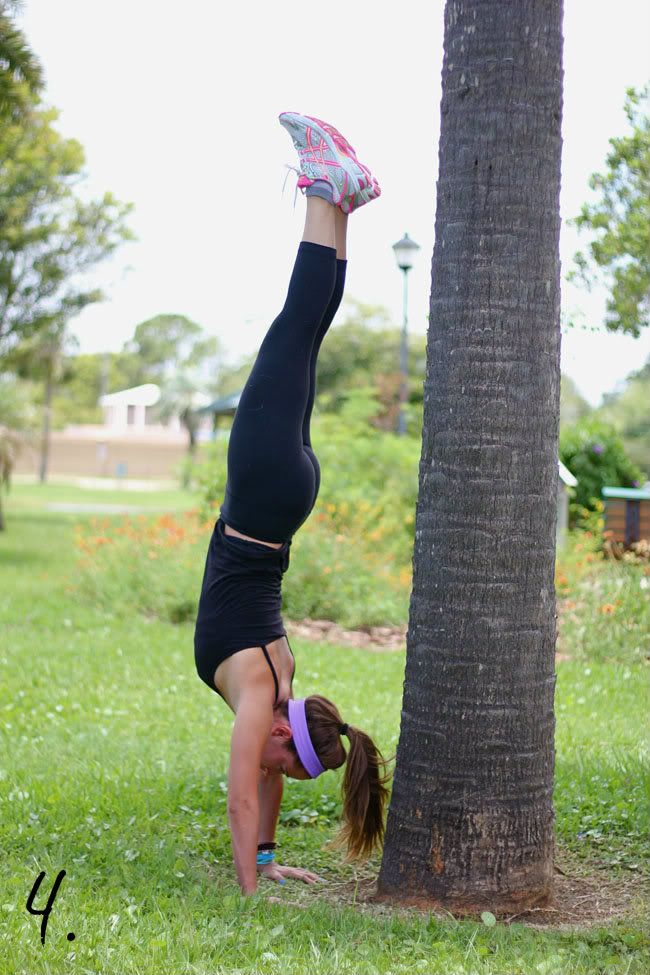
Step 4: Balance here, stabilize yourself. Tighten the stomach, look down between your hands at your drishti. One foot at a time, push off from the tree until you're balancing on your hands. Breathe, balance, thrive.

Tips

-Make sure you have a drishti (focal point) between your hands before you even kick up. Relax the face, and concentrate on this one focal point.

Benefits

-Helps stress and depression. Strengthens shoulders, arms and wrists. Improves balance.

AcroYoga is for Lovers


A couple days ago I was assisting on a beach photo shoot and at the last minute, they decided they wanted to do something a little different. Obviously my mind went straight to yoga possibilities, and here's what we came up with:


Beautiful!

Yoga Tip: Ustrasana

Ustrasana, or camel pose, is a great way to open the heart, stretch the front body, and help anxiety. The first time I did it (in a Bikram class), I thought I might die- it's kind of a scary pose when you're new to it, but apparently that is a common reaction for people. So fear not, you will not die. Come out of it slowly and just breathe.

How to do it: Begin by kneeling on the floor, knees hip distance apart, thighs slightly rotated inward. Draw the sitting bones forward and up, firming the buttocks. Rest your hands on the mounds of your heels, fingers pointing behind you. Push the hips forward and feel a lift from the chest. Drop the head back if it feels right for you. Stay here for three or more breaths (up to 30 seconds). To come out, bring your hands to your hips and sit back on your calves, leading with your heart.

Tip: This pose can bring about an emotional release- I've talked to many people who have felt sad, angry or had full out laughing fits after this pose. If this happens to you, or doesn't happen to you, just let it be- everything is fine.

Beginners may not be able to touch their hands to their feet. If this happens, place your toes on the mat to raise the heels. If you're still not able to touch, use blocks.

*Do not do this pose if you have lower back or neck problems.

Benefits: Stretches the front body, ankles, thighs, hip flexors, groins, abs and throat. Improves posture, stimulates internal organs, and strengthens back muscles.

Yoga Tip: Salutes for Runners (or anyone, really)

Here is a six minute video of sun salutations with variations I created for runners (or anyone, really). Runners often have tightness in their hamstrings and lower back. In the vinyasa, you'll do downward facing dogs and forward folds, which help to release tension in the lower back and elogate the hamstrings. You'll do low lunges and crescent moon postures which target the glutes, quads and hip-flexors.

*Tip: During upward facing dog, the only parts of the body that are touching the mat are the hands and the tops of the feet.

Yoga Tip: Chair Yoga |pt 2|

Today we have a continuation of last week's Yoga Tip: Chair Yoga |pt 1|. These can be done right in your office chair at work or at the kitchen table at home. 

Seated Piriformis Stretch

This is a great stretch for the glutes and the lower back. 

Step 1: Sit towards the edge of your seat. Look down and make sure your left ankle is in line with your left knee. Tilt your pelvis slightly forward to lengthen from the tailbone all the way through the head. Inhale and bring the right ankle to rest on the left thigh. Exhale the hands to anjali mudra, prayer position. Inhale and lean forward about 45 degrees, being sure to maintain the length in the spine. Breathe here for three to five breaths, and go out of the posture as gracefully as you went in. Repeat on the other side. 

Upward Dog |on a chair|

Step 1: It's urdhva mukha svanasana, for all you Sanskrit learners out there, but upward facing dog is how we'll refer to it here. Start on your hands and knees in front of the chair. Be sure your knees are in line with your hips, legs hip distance apart. Place your hands on the chair shoulder width apart.

Step 2: Inhale and pull yourself up, lifting your knees off the ground and rolling onto the tops of the feet. Be sure your wrists, elbows and shoulders are in one long line. Exhale and look up, feeling one long line of energy from the tips of the toes all the way up through the crown of the head. Be mindful of the shoulders- bring them away from the ears. Engage the arms and the legs. Breathe here for three to five breaths. 

Hamstring/Back/Shoulder Stretch

A triple threat stretch, my friends! Great for waking up the entire body after being seated for a long time. 

Step 1: Start by standing behind the chair, hands on the back of the chair, shoulder distance apart. Walk yourself back until your body is at a 90 degree angle and ankles, knees and hips are in one line, feet are hip distance apart. Inhale to find length up the back legs, exhale to find length from the coccyx through the top of the head. Feel the back very light and weightless (ie try not to let your back become the letter U). Inhale and bring the shoulders away from the ears, feeling the shoulder blades lengthen down the sides of the back and exhale, feeling length from the base of the shoulder blades all the way through the tips of the fingers which are spread and energized. Take a few more breaths here and come out as gracefully as you went in.

Hope you enjoyed! 

Yoga Tip: Chair Yoga |pt 1|

Do you ever find yourself sitting at work and feeling run down or achy? Here are a couple yoga postures you can do right in your office chair for quick rejuvenation.

Cat ~ Cow

As the name implies, there are two parts to this posture. First, we'll start with the cow. (I have no idea why it's called the cow. The cat name I get, but the cow leaves me puzzled. Anyway.) 

Step 1: Start by sitting at the end of your seat. Tip your pelvis forward to straighten out the lower spine. Feet and knees hip distance apart. Ankles in line with the knees. Inhale feeling long and tall. Exhale. 

Step 2: Imagine there are strings attached to the center of your chest and the back of the head. Inhale and feel those strings pull- your head goes back as your chest comes forward for an arch in the back. 

Step 3: Exhale into cat pose (imagine a scared cat that lifts its spine up when spooked). Your head comes forward, chin to chest, and your spine rounds like the letter C.

Step 4: Inhale back into cow, exhale into cat. Do this a few times.

Chair Pose with Side Twist

This is a great pose to strengthen the spine and shoulders, stimulate the abs, diaphragm and heart, and help aching feet (when done properly). 

Step 1: Sit on the edge of your chair, feet together, knees together. Squeeze the thighs together. Inhale and send your body forward at an angle, lifting the arms. Be mindful to keep the back straight- do not sway the back. Energized arms and fingers. Exhale the shoulders away from the ears, pushing into all four corners of the feet, continuing to hold. Hold for five deep breaths, then ....

Step 2: Exhale, bringing the hands to your heart center in prayer position. Breathe here for three breaths, continuing to push into all four corners of the feet, staying mindful of the back. One final inhale and then...

Step 3: Exhale and twist from the navel, to the left, hooking your right elbow to the outside of the left knee (or intending to get it there without straining). Breathing here, feeling one long line of energy from your ankles all the way up through the left elbow. Intend to get the elbows in a straight line, perpendicular to the floor. Exhale to the center, inhale, and then exhale to the right side.